이번 포스팅에서는 전체 화면으로 Dialog를 띄우는 방법에 대해 알아볼 것이다. 전체 화면으로 동작하는 Dialog를 만드는 방법으로는 크게 두 가지가 있다.
Dialog처럼 보이는 Activity를 만들어 띄우기
Dialog를 Customizing하여 Fullscreen으로 띄우기
둘 중 어떤 것이 베스트라고 할 수는 없지만, 기왕이면 '다이얼로그’라는 이름답게 2번 방식을 따라 보기로 했다. 최초 작성 코드 언어는 java였으나 kotlin으로 변경하였고, findViewById 대신 ViewBinding 을 적용하였다.
SHOW DIALOG 버튼 클릭시 Fullscreen으로 동작하는 Dialog가 출력되고, SUBMIT/CANCEL 버튼 클릭 이벤트와 동시에 Toast가 출력되는 예제 앱이다.
MyCustomDialog 라는 이름의 Project를 empty activity로 생성하고, build.gradle 에 viewBinding 사용 선언을 우선 해 주어야 한다.
build.gradle 1 2 3 4 5 6 android { ... viewBinding { enabled = true } }
app 수준의 build.gradle 에 위 코드를 추가하고 sync 버튼을 눌러 준다.
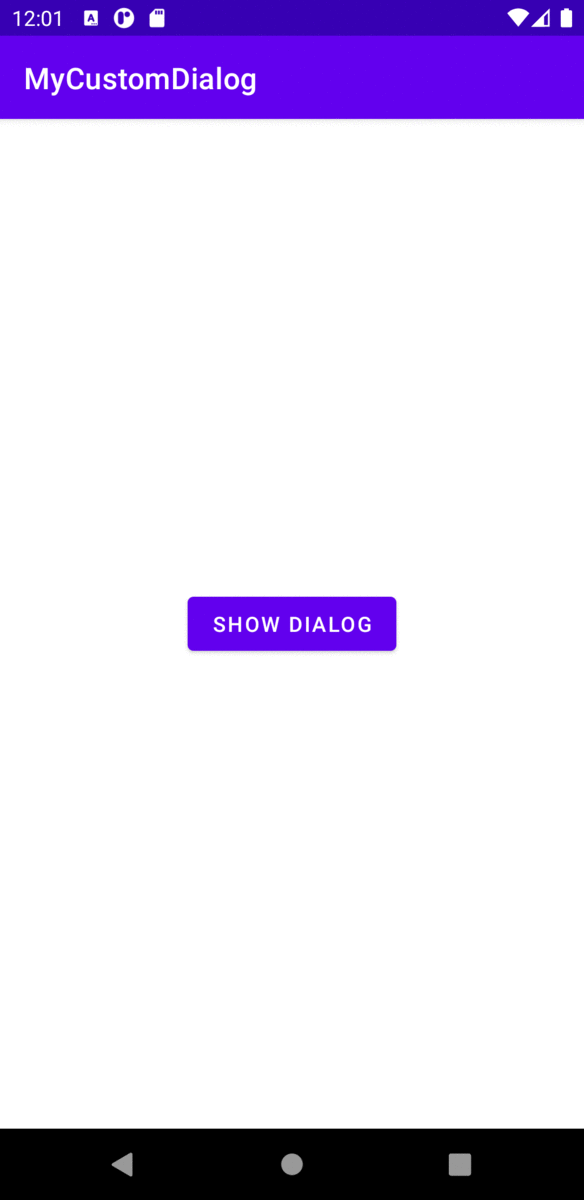
activity_main.xml 파일 정 가운데에 SHOW_DIALOG 버튼을 생성한다.
activity_main.xml 1 2 3 4 5 6 7 8 9 10 11 12 13 14 15 16 17 18 19 20 <?xml version="1.0" encoding="utf-8"?> <androidx.constraintlayout.widget.ConstraintLayout xmlns:android ="http://schemas.android.com/apk/res/android" xmlns:app ="http://schemas.android.com/apk/res-auto" xmlns:tools ="http://schemas.android.com/tools" android:layout_width ="match_parent" android:layout_height ="match_parent" tools:context =".MainActivity" > <Button android:id="@+id/showDialogButton" android:layout_width="wrap_content" android:layout_height="wrap_content" android:text="SHOW DIALOG" app:layout_constraintBottom_toBottomOf="parent" app:layout_constraintLeft_toLeftOf="parent" app:layout_constraintRight_toRightOf="parent" app:layout_constraintTop_toTopOf="parent" tools:ignore="HardcodedText" /> </androidx.constraintlayout.widget.ConstraintLayout >
dialog_full_activity.xml 파일을 res/layout 에 생성한 다음 아래 코드를 넣어 준다.
dialog_full_activity.xml 1 2 3 4 5 6 7 8 9 10 11 12 13 14 15 16 17 18 19 20 21 22 23 24 25 26 27 28 29 30 31 32 33 34 35 36 37 38 39 40 41 42 43 44 45 46 47 48 49 50 51 52 53 54 55 56 57 58 59 60 61 62 63 64 65 66 67 68 69 70 71 72 73 74 75 76 77 78 79 80 81 <?xml version="1.0" encoding="utf-8"?> <androidx.constraintlayout.widget.ConstraintLayout xmlns:android ="http://schemas.android.com/apk/res/android" xmlns:app ="http://schemas.android.com/apk/res-auto" xmlns:tools ="http://schemas.android.com/tools" android:layout_width ="match_parent" android:layout_height ="match_parent" android:background ="#E6003049" > <androidx.constraintlayout.widget.ConstraintLayout android:layout_width="match_parent" android:layout_height="match_parent" android:padding="20dp" app:layout_constraintBottom_toBottomOf="parent" app:layout_constraintEnd_toEndOf="parent" app:layout_constraintHorizontal_bias="1.0" app:layout_constraintStart_toStartOf="parent" app:layout_constraintTop_toTopOf="parent" app:layout_constraintVertical_bias="0.0"> <TextView android:id="@+id/titleTextView" android:layout_width="wrap_content" android:layout_height="wrap_content" android:layout_marginBottom="21dp" android:lineSpacingExtra="4sp" android:textColor="#ee6c4d" android:textSize="16.5sp" app:layout_constraintBottom_toTopOf="@id/messageTextView" app:layout_constraintEnd_toEndOf="parent" app:layout_constraintStart_toStartOf="parent" tools:text="@string/default_dialog_title" /> <TextView android:id="@+id/messageTextView" android:layout_width="wrap_content" android:layout_height="wrap_content" android:lineSpacingExtra="4sp" android:textColor="#FFFFFF" android:textSize="22.5sp" app:layout_constraintBottom_toBottomOf="parent" app:layout_constraintEnd_toEndOf="parent" app:layout_constraintStart_toStartOf="parent" app:layout_constraintTop_toTopOf="parent" tools:text="@string/default_dialog_message" /> <Button android:id="@+id/submitButton" android:layout_width="138dp" android:layout_height="0dp" android:layout_marginTop="30dp" android:layout_marginEnd="3.75dp" android:backgroundTint="#012a4a" android:letterSpacing="-0.05" android:lineSpacingExtra="1.3sp" android:text="@string/default_dialog_submit_caption" android:textColor="#ffffff" android:textSize="13.5sp" app:layout_constraintEnd_toStartOf="@id/cancelButton" app:layout_constraintHorizontal_chainStyle="packed" app:layout_constraintStart_toStartOf="parent" app:layout_constraintTop_toBottomOf="@+id/messageTextView" app:layout_constraintVertical_chainStyle="packed" /> <Button android:id="@+id/cancelButton" android:layout_width="138dp" android:layout_height="0dp" android:layout_marginStart="3.75dp" android:layout_marginTop="30dp" android:backgroundTint="#012a4a" android:letterSpacing="-0.05" android:lineSpacingExtra="1.3sp" android:text="@string/default_dialog_cancel_caption" android:textColor="#ffffff" android:textSize="13.5sp" app:layout_constraintEnd_toEndOf="parent" app:layout_constraintStart_toEndOf="@+id/submitButton" app:layout_constraintTop_toBottomOf="@+id/messageTextView" /> </androidx.constraintlayout.widget.ConstraintLayout > </androidx.constraintlayout.widget.ConstraintLayout >
이대로 실행할 경우 error가 발생한다. strings.xml 에 필요한 값이 누락되어 있기 때문이다. res/values/strings.xml 파일을 다음과 같이 수정해 보자.
strings.xml 1 2 3 4 5 6 7 8 9 <resources > <string name ="app_name" > MyCustomDialog</string > <string name ="default_dialog_title" > 다이얼로그 타이틀</string > <string name ="default_dialog_message" > 다이얼로그 메시지</string > <string name ="default_dialog_submit_caption" > 확인</string > <string name ="default_dialog_cancel_caption" > 취소</string > </resources >
모든 레이아웃 작업이 간단히 끝났다.
CustomDialogMaker는 object로, Fullscreen Dialog를 쉽게 생성할 수 있도록 만들어 주는 일종의 유틸이다. getDialog 를 통해 어느 곳에서나 Custom Dialog 내 text를 수정하여 출력하는 기능을 제공한다.
우선, CustomDialogMaker.kt 에서 확인 버튼과 취소 버튼 각각의 이벤트를 전달할 수 있도록 interface 를 생성하자.
CustomDialogListener.kt 1 2 3 4 interface CustomDialogListener fun onClickSubmitButton () fun onClickCancelButton () }
각 버튼의 클릭 이벤트가 들어왔을 때 각각 이벤트에 따라 위 작성된 interface 를 target으로 실질적 구현부(ex-Activity)에서 이벤트를 수신하도록 했다. 말로 풀어 쓰니 어려운데, 아래 코드(CustomDialogMaker.kt)를 확인하자.
CustomDialogMaker.kt 1 2 3 4 5 6 7 8 9 10 11 12 13 14 15 16 17 18 19 20 21 22 23 24 25 26 27 28 29 30 31 object CustomDialogMaker { fun getDialog ( context: Context , title: String , message: String , submitCaption: String , cancelCaption: String , target: CustomDialogListener ) val dialog = Dialog(context, R.style.FullWindowDialog) val dialogBinding = DialogFullActivityBinding.inflate(dialog.layoutInflater) dialog.setContentView(dialogBinding.root) dialogBinding.titleTextView.text = title dialogBinding.messageTextView.text = message dialogBinding.submitButton.text = submitCaption dialogBinding.cancelButton.text = cancelCaption dialogBinding.submitButton.setOnClickListener { target.onClickSubmitButton() dialog.dismiss() } dialogBinding.cancelButton.setOnClickListener { target.onClickCancelButton() dialog.dismiss() } dialog.show() } }
CustomDialogMaker.getDialog(인자) 로 호출할 때, 이것을 호출한 곳에서 onClickSubmitButton(), onClickCancelButton() 이벤트를 처리하도록 한 코드이다. findViewById 대신 viewBinding 을 이용하여 코드를 경량화하였다.
MainActivity.kt 파일에서는 ViewBinding 대신 findViewById 를 이용하여 showDialogButton 에 onClickListener 를 추가하였고, 버튼 클릭시 Dialog 가 출력되도록 코드를 작성하였다.
MainActivity.kt 1 2 3 4 5 6 7 8 9 10 11 12 13 14 15 16 17 18 19 20 21 22 23 24 25 26 class MainActivity : AppCompatActivity override fun onCreate (savedInstanceState: Bundle ?) super .onCreate(savedInstanceState) setContentView(R.layout.activity_main) val showDialogButton = findViewById<Button>(R.id.showDialogButton) showDialogButton.setOnClickListener { CustomDialogMaker.getDialog( this , "title" , "message" , "submit" , "cancel" , object : CustomDialogListener { override fun onClickSubmitButton () Toast.makeText(applicationContext, "SUBMIT!" , Toast.LENGTH_SHORT).show() } override fun onClickCancelButton () Toast.makeText(applicationContext, "CANCEL!" , Toast.LENGTH_SHORT).show() } }) } } }
위 예시와 같이 CustomDialogMaker.getDialog(values..) 를 통해 CustomDialog 를 손쉽게 가져다 사용할 수 있었다.
위 형태가 베스트 케이스인지에 대해선 확신이 없으나, Custom Dialog의 전반적인 Layout은 유지하고 싶으나 Button의 text나 title, message의 변경이 필요할 때 사용하기 위해 작성하였다. dialog builder를 이용하여 생성하는 방법이 가장 쉬우나, 그 경우에는 fullscreen을 어떻게 세팅해 주어야 할지 감이 오지 않았다. 혹, 이 글을 읽는 분들 중 dialog builder를 이용해 fullscreen을 설정하는 방법을 아는 분이 계신다면 댓글로 아이디어 공유 부탁드립니다.
전체 코드는 github repository 에 업로드하였다. java/kotlin 두 가지 버전으로 작성하였으며, branch를 이동하여 확인할 수 있다.