[Hyperledger] Composer 쿼리 튜토리얼 실습하기

Hyperledger Composer 쿼리 튜토리얼 실습하기

공식 사이트에서 제공하는 튜토리얼을 실습하며 이어가는 포스팅이다. 이번 포스팅에서는 기본 쿼리 언어를 이용, 필터링된 결과를 얻는 방법을 실습해 볼 것이다. 뿐만 아니라, 쿼리를 사용하면 트랜잭션에서 호출되어 결과 에셋을 업데이트하거나 제거하는 등의 작업을 수행 할 수 있다. 단, 이 실습은 이전 실습을 수행했다는 가정 하에 진행된다.


1. 비즈니스 네트워크 업데이트

개발자 튜토리얼에서 만든 비즈니스 네트워크를 업데이트해야 한다.

1. 모델 파일 업데이트

tutorial-network 디렉토리에 있는 models 폴더에서 .cto 파일을 열고, 다음의 이벤트와 트랜잭션을 추가한 후 저장한다.

1
2
3
4
5
6
7
8
9
10
event TradeNotification {
--> Commodity commodity
}

transaction RemoveHighQuantityCommodities {
}

event RemoveNotification {
--> Commodity commodity
}

2. 트랜잭션 로직 업데이트

lib/logic.js 파일을 열고, 트랜잭션 로직을 다음으로 교체한 후 저장한다.

1
2
3
4
5
6
7
8
9
10
11
12
13
14
15
16
17
18
19
20
21
22
23
24
25
26
27
28
29
30
31
32
33
34
35
36
37
38
39
40
/**
* Track the trade of a commodity from one trader to another
* @param {org.example.mynetwork.Trade} trade - the trade to be processed
* @transaction
*/
async function tradeCommodity(trade) {

// set the new owner of the commodity
trade.commodity.owner = trade.newOwner;
let assetRegistry = await getAssetRegistry('org.example.mynetwork.Commodity');

// emit a notification that a trade has occurred
let tradeNotification = getFactory().newEvent('org.example.mynetwork', 'TradeNotification');
tradeNotification.commodity = trade.commodity;
emit(tradeNotification);

// persist the state of the commodity
await assetRegistry.update(trade.commodity);
}

/**
* Remove all high volume commodities
* @param {org.example.mynetwork.RemoveHighQuantityCommodities} remove - the remove to be processed
* @transaction
*/
async function removeHighQuantityCommodities(remove) {

let assetRegistry = await getAssetRegistry('org.example.mynetwork.Commodity');
let results = await query('selectCommoditiesWithHighQuantity');

for (let n = 0; n < results.length; n++) {
let trade = results[n];

// emit a notification that a trade was removed
let removeNotification = getFactory().newEvent('org.example.mynetwork','RemoveNotification');
removeNotification.commodity = trade;
emit(removeNotification);
await assetRegistry.remove(trade);
}
}

2. 쿼리(Query) 파일 만들기

tutorial-networkqueries.qry 파일을 생성하고, 해당 파일에 다음 코드를 붙여넣고 저장한다.

1
2
3
4
5
6
7
8
9
10
11
12
13
14
15
16
17
18
19
20
21
22
23
24
25
26
27
28
29
/** Sample queries for Commodity Trading business network
*/

query selectCommodities {
description: "Select all commodities"
statement:
SELECT org.example.mynetwork.Commodity
}

query selectCommoditiesByExchange {
description: "Select all commodities based on their main exchange"
statement:
SELECT org.example.mynetwork.Commodity
WHERE (mainExchange==_$exchange)
}

query selectCommoditiesByOwner {
description: "Select all commodities based on their owner"
statement:
SELECT org.example.mynetwork.Commodity
WHERE (owner == _$owner)
}

query selectCommoditiesWithHighQuantity {
description: "Select commodities based on quantity"
statement:
SELECT org.example.mynetwork.Commodity
WHERE (quantity > 60)
}

3. 비즈니스 네트워크 아카이브 재생성

비즈니스 네트워크에서 파일을 변경했다면, 비즈니스 네트워크 아카이브(.bna) 로 다시 패키징하고 Hyperledger Fabric 인스턴스에 배포해야한다. 배포한 네트워크를 업그레이드하기 위해서는 새 버전 번호가 필요하다. 버전은 tutorial-network 디렉토리의 package.json파일에서 수정할 수 있다. package.json 파일에서 version 속성을 찾고, 0.0.1이라고 쓰여진 버전을 0.0.2로 수정한 후 저장하자. 이후, tutorial-network에서 다음의 명령어를 실행하면 0.0.2 버전에 대한 아카이브가 생성된다.

1
composer archive create --sourceType dir --sourceName . -a tutorial-network@0.0.2.bna

4. 업데이트한 비즈니스 네트워크 배포

기존에 배포된 0.0.1 버전에서 0.0.2 버전으로 블록체인 네트워크를 업데이트 해 보자.

1. 새 비즈니스 네트워크 설치

tutorial-network@0.0.2.bna 파일이 있는 디렉토리로 이동하고, (해당 파일은 대부분 tutorial-newtork 디렉토리에 있을 것이다.) 다음의 명령어로 업데이트 된 비즈니스 네트워크를 설치하자.

1
composer network install --card PeerAdmin@hlfv1 --archiveFile tutorial-network@0.0.2.bna

2. 네트워크 업그레이드 및 확인

1
2
3
4
# 네트워크 업그레이드
composer network upgrade -c PeerAdmin@hlfv1 -n tutorial-network -V 0.0.2
# 네트워크 버전 확인
composer network ping -c admin@tutorial-network | grep Business

5. REST API 재생성

이전 실습에서 REST API를 만들었던 내용과 같다. tutorial-network 디렉토리에 접근하여 다음의 명령을 실행하자.

1
composer-rest-server

이것저것 뭘 입력하라고 하는데, 다음과 같은 순서로 입력하면 된다.

1
2
3
4
5
Enter the name of the business network card to use: admin@tutorial-network
Specify if you want namespaces in the generated REST API: never use namespaces
Specify if you want to enable authentication for the REST API using Passport: No
Specify if you want to enable event publication over WebSocket: Yes
Specify if you want to enable TLS security for the REST API: No

중간에 잘못 입력했다면 ctrl+c로 빠져나와서 다시 처음부터 입력하면 된다.


6. REST API 테스트 및 일부 데이터 추가

먼저, http://localhost:3000/explorer로 이동하고, Commodity 아래의 Query를 클릭해 보면 다음과 같이 보여질 것이다.

출처: https://hyperledger.github.io/composer/latest/tutorials/queries

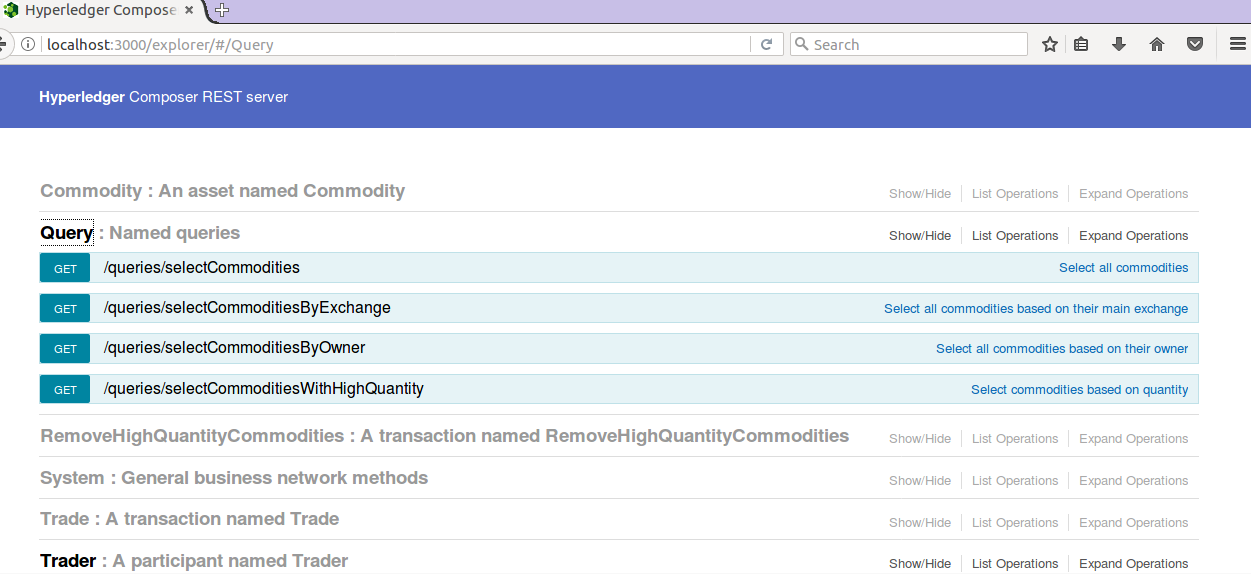
쿼리를 사용하기 위해 데이터를 만들어야 한다. REST API를 사용하여 3 명의 Traders(참가자)와 일부 Commodities(자산)을 만들어 보자.

1. Trader(상인) 추가

REST Explorer의 ‘Trader’ 안에 있는 'POST’를 클릭한다. 이후 Parameter에 아래의 내용을 추가하고 Try it out!을 클릭하면 Trader 추가가 완료된다.

1
2
3
4
5
6
{
"$class": "org.example.mynetwork.Trader",
"tradeId": "TRADER1",
"firstName": "Jenny",
"lastName": "Jones"
}

같은 방법으로 두 명의 Trader를 추가로 등록한다.

1
2
3
4
5
6
{
"$class": "org.example.mynetwork.Trader",
"tradeId": "TRADER2",
"firstName": "Jack",
"lastName": "Sock"
}
1
2
3
4
5
6
{
"$class": "org.example.mynetwork.Trader",
"tradeId": "TRADER3",
"firstName": "Rainer",
"lastName": "Valens"
}

2. Commodity(상품) 추가

REST Explorer의 'Commodity’에 속해 있는 'POST’를 클릭한다. Trader 추가와 같은 방식으로 Commodity를 등록하면 된다. Parameter에 아래 두 상품을 등록해 보자.

1
2
3
4
5
6
7
8
{
"$class": "org.example.mynetwork.Commodity",
"tradingSymbol": "EMA",
"description": "Corn",
"mainExchange": "EURONEXT",
"quantity": 10,
"owner": "resource:org.example.mynetwork.Trader#TRADER1"
}
1
2
3
4
5
6
7
8
{
"$class": "org.example.mynetwork.Commodity",
"tradingSymbol": "CC",
"description": "Cocoa",
"mainExchange": "ICE",
"quantity": 80,
"owner": "resource:org.example.mynetwork.Trader#TRADER2"
}

7. REST API를 이용한 쿼리 테스트

1. 간단한 REST 쿼리 수행

selectCommodities 쿼리를 테스트해 보자. 이 쿼리는 상품을 반환하는 쿼리이다.

오른쪽의 Select all commodities를 클릭하고, Try it out! 버튼을 클릭한다.

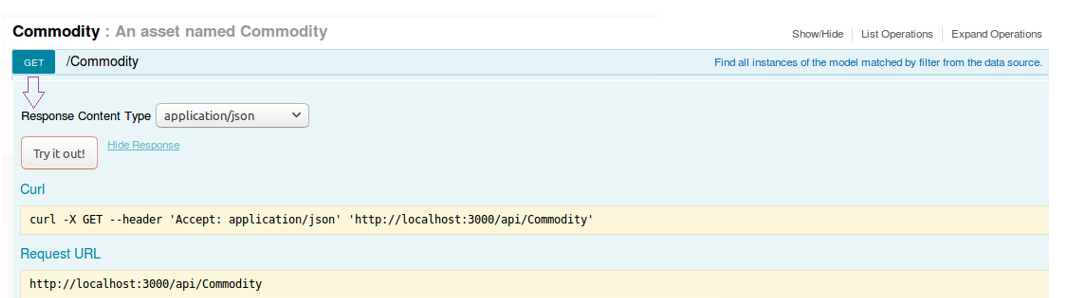
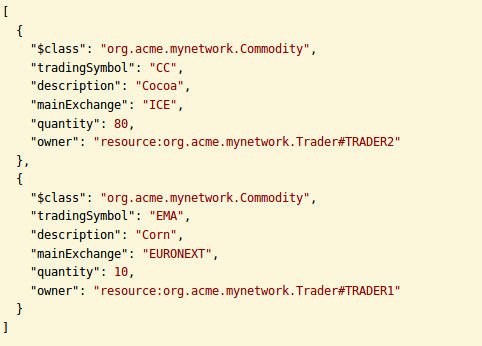
아래와 같이, 기존에 등록한 모든 상품을 반환하면 성공이다.

2. 필터링한 REST 쿼리 수행

EURONEXT 거래소에서 거래된 상품을 필터링하기 위해 selectCommoditiesByExchange을 클릭한 후, Exchange 매개 변수에 EURONEXT을 입력하고 Try it out! 버튼을 클릭한다.

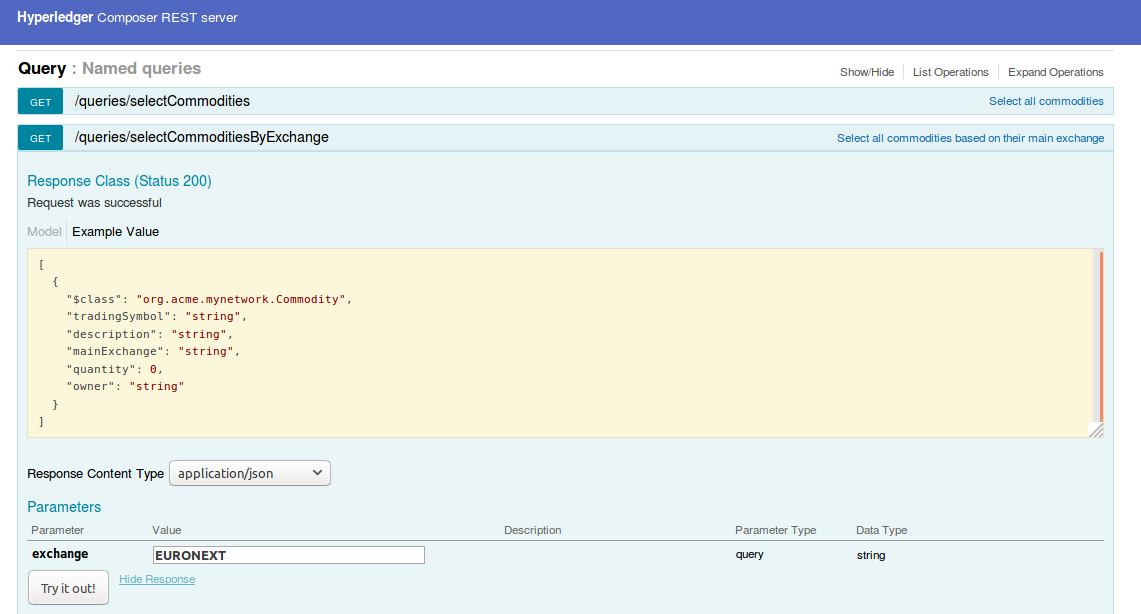
아래와 같이 결과값을 받을 수 있는데, EURONEXT에서 거래된 상품만을 보여준다.

3. 쿼리를 사용한 트랜잭션 업데이트

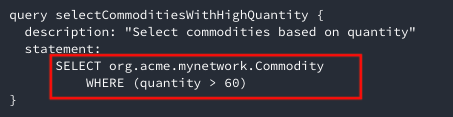
우리는 query.qry 파일에 selectCommoditiesWithHighQuantityQuantity60보다 큰 Commodities를 반환하는 쿼리로 작성했다.

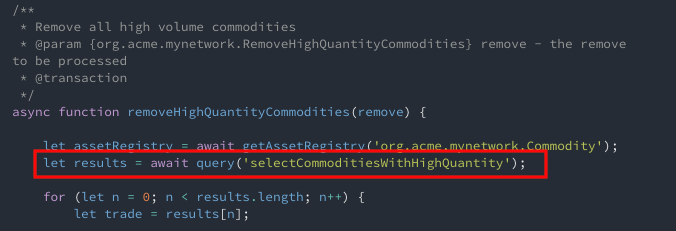
업데이트와 제거의 기능도 위와 마찬가지로 쿼리로 정의할 수 있다.

removeHighQuantityCommodities 트랜잭션에서  selectCommoditiesWithHighQuantity 쿼리를 사용한다. REST Explorer에서 GET을 실행하면 60보다 큰 에셋만 선택되어 제거될 것이다.

이 쿼리를 사용해서 상품을 삭제해 보자. 삭제 전에, 우리가 지정한 조건에 맞는 상품(Quantity가 60보다 큰)이 있는지 QuerySelectCommodities를 실행하자.

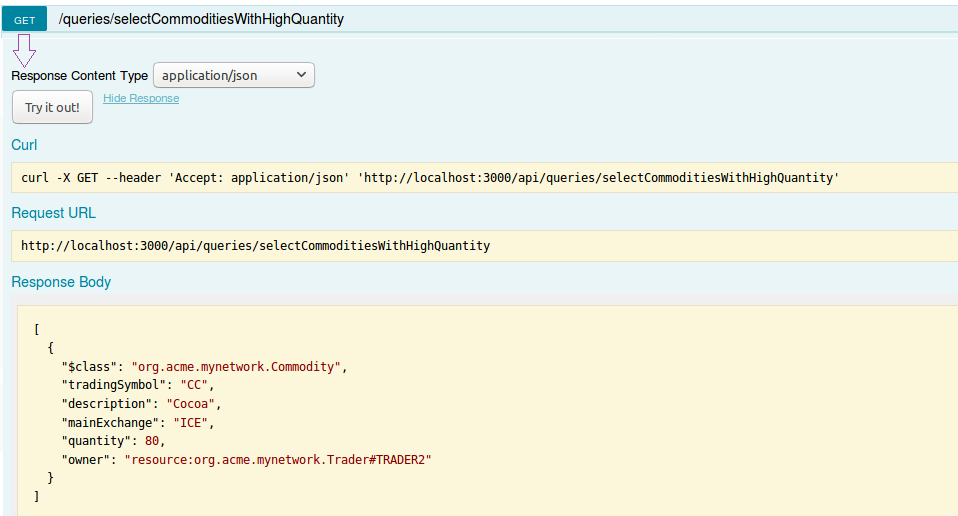
코코아(Cocoa)의 수량이 80으로 60보다 큰 것을 확인할 수 있다. 이제 selectCommoditiesWithHighQuantity 쿼리가 정상적인 결과를 출력하는지 확인해 보자. 다음과 같은 화면을 보았다면 성공인 것이다.

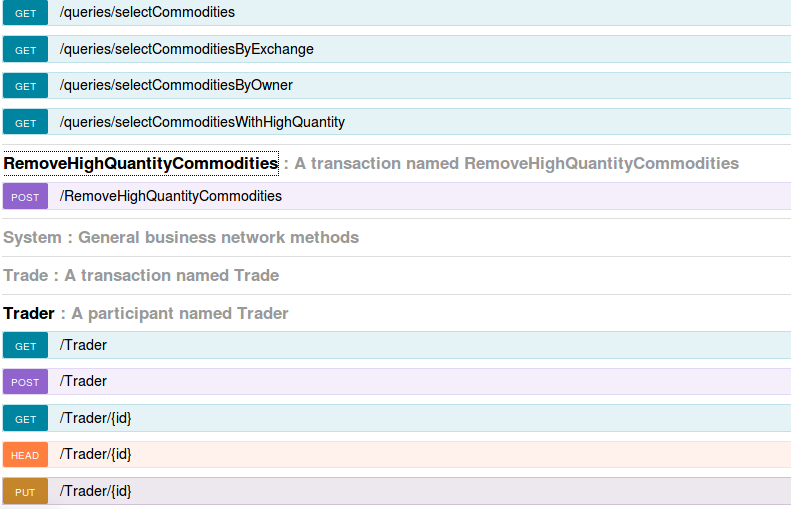
이제 본격적으로 아이템을 제거해 보자. RemoveHighQuantityCommodities를 클릭하면 다음과 같은 화면이 등장한다.

POST를 클릭하고, 스크롤을 내려 Try it out!을 클릭한다.

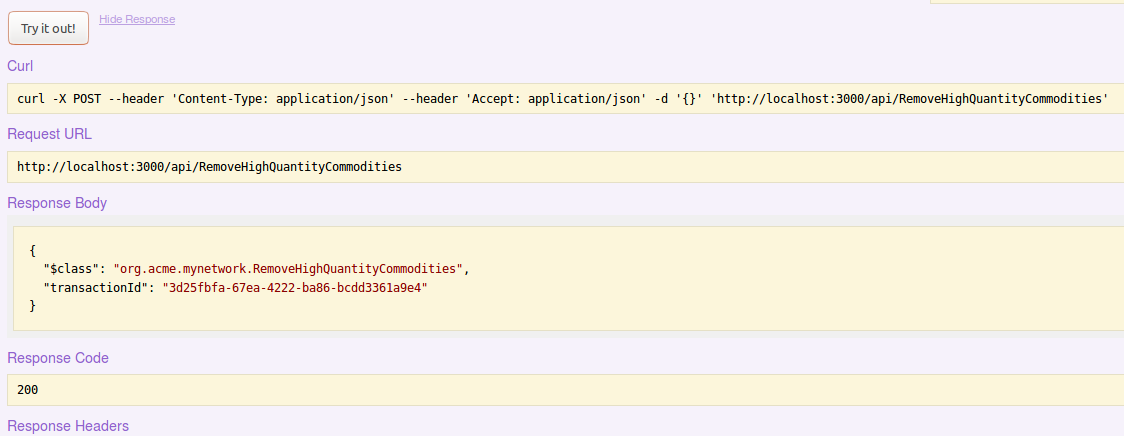
Response code로 200을 받았다면 아이템이 정상적으로 지워졌다는 뜻이다. 실제로 지워졌는지 확인하기 위해 CommodityGET을 클릭해 보자.

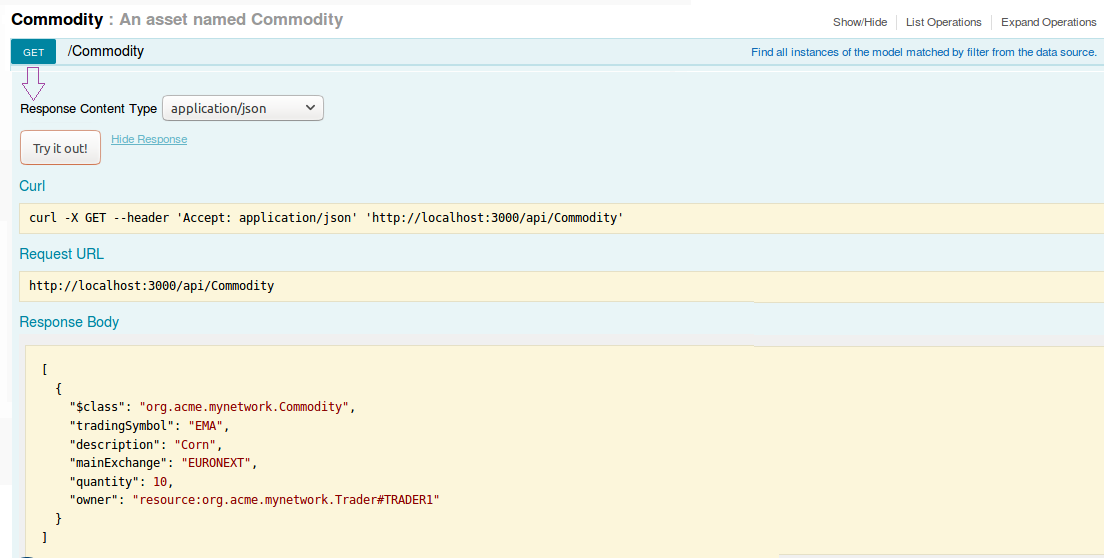
결과로 Corn만 출력됐다면 성공적으로 지워진 것이다.

Share